
Renovating a small bathroom? It’s quite a challenge since you’re working with limited space. You want the space to feel breezy and open, but it still has to stand up to the daily steam and heavy foot traffic of a busy household.
The right tiles do a lot more than just keep your walls waterproof; they influence the room’s aesthetics as well. By picking specific sizes and layouts, you can turn a cramped bathroom into a spot that feels surprisingly roomy. In this article, we’ll discuss ways on exactly how you can do that.
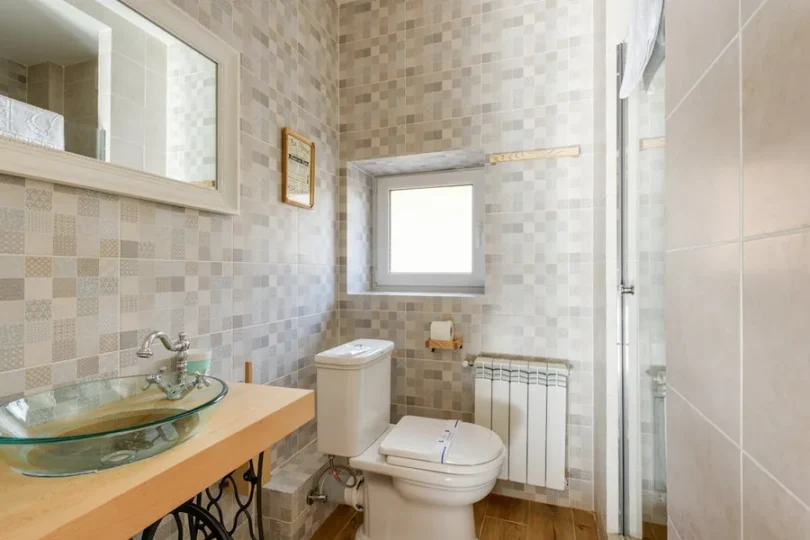
Go Big With Your Tile Size
Putting massive tiles in a tiny room is actually one of the best ways to open things up. Large-format tiles from a tile clearance outlet mean you have far fewer grout lines to look at.
When there aren’t dozens of lines breaking up the floor or walls, your eyes can glide across the surface without stopping. This creates a smooth, seamless look that tricks the brain into thinking the floor plan is bigger than it really is.
In many households, a 600x600mm tile is the go-to choice for a modern finish. Make sure your tiler checks that the walls are perfectly straight first, as big tiles need a very flat surface to avoid any awkward edges.
Use Vertical Layouts to Add Height
Want to make a space feel less claustrophobic? The direction of your tiles plays a big role. A vertical stack bond is where you lay rectangular tiles in straight, upright columns. This naturally draws the eye upward, highlighting the height of the room instead of focusing on how narrow the floor is. It’s the type of layout that works well with KitKat tiles or your standard subway shapes. Going vertical gives a nod to modern design while keeping everything looking tidy.
Blend Your Grout for a Seamless Finish
If you pair white tiles with dark charcoal grout, you end up highlighting every single edge, making the room look busy. To get that spacious feel, try to match your grout colour as closely as you can to the tile itself.
When the grout blends in, the borders of the tiles seem to disappear. The result is a continuous surface that looks sleek and expansive. It might look like a simple technical move, but it can definitely upgrade the vibe of your bathroom.
Stick to One Tile for Floors and Walls
One of the most effective tricks is using the exact same tile for both the floor and the walls. This is often called a floor-to-ceiling look. By using just one material, you get rid of that visual break where the floor meets the wall. This continuity makes the floor look like it’s folding upward, which really stretches the space.
Soft greys, warm beiges, or stone looks work beautifully for this. Does this look a bit plain for your taste? You can play with different textures instead of different colours. A matte finish on the floor keeps things safe and slip-resistant, while a polished version of that same tile on the walls can reflect light and add a bit of a luxe feel.
Lean Into Light Tones and Glossy Surfaces
Light is your best mate when you are short on space. Lighter tiles like off-whites, creams, or pale greys reflect a lot more light. If your bathroom only has one small window or no natural light at all, these tones would work well.
Glossy tiles are good choices, too. Much like a mirror, the shiny surface of a gloss tile bounces light back into the room, adding depth. If you prefer something a bit more grounded, a satin finish is a great middle ground. It gives off a soft glow without being quite as reflective as a full gloss.
Try a Diagonal Pattern for Extra Width
If you’re dealing with a particularly narrow room, try laying your floor tiles on a 45-degree angle. A diagonal layout leads the eye to the widest parts of the room. It breaks up that standard square grid and makes the floor feel like it’s pushing outward.
It does take a bit more planning, and you might end up with a few more off-cuts, but the result is worth the effort. We’re talking about a classic design move that adds a professional touch to any renovation. It shows you have really thought about the geometry of the space to make the most of every centimetre.
Create a Subtle Feature Wall
You don’t have to avoid patterns just because the room is small. Sometimes, a focal point can actually give the room more depth. Tiling the back wall of a walk-in shower with a different texture or a soft pattern can draw the eye toward the furthest point. This creates a sense of perspective that makes the room feel deeper.
If you keep the feature tile in the same colour family as the rest of the room, it stays cohesive. It’s a nice way to make sure the bathroom does not look like a plain white box while still being smart about the limited space.
Focus on Simplicity and Quality
When you are working in a tight area, every little detail gets noticed. That is why picking a quality tile and a precise layout is so vital. Choosing well-made porcelain or ceramic tiles means the edges are sharp and the sizes are consistent, which leads to a much cleaner finish.
By focusing on these clever layouts and a bright palette, you can turn a small bathroom into a premium retreat. It’s all about working with the natural light and the lines of the room to create something that feels open and inviting. A little bit of extra thought during the planning stage goes a long way in making your bathroom look great for years to come.