
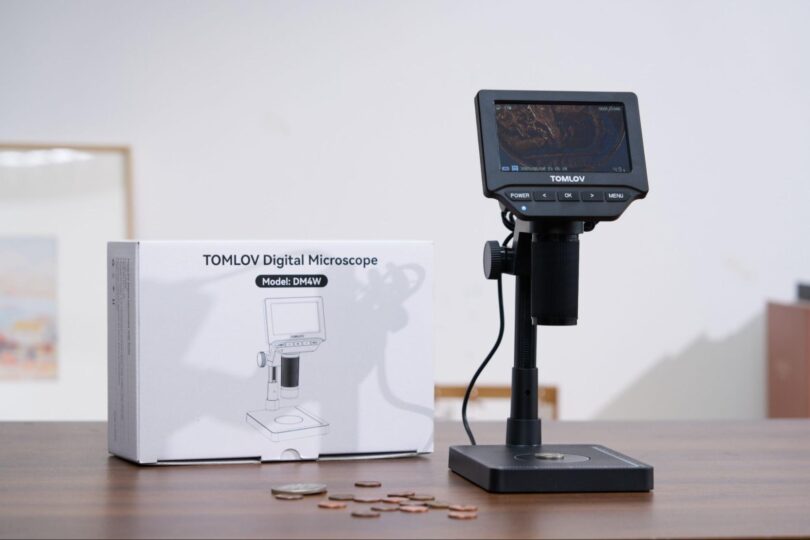

Digital microscopes revolutionize jewelry and gemstone inspection by providing crystal-clear magnification and reducing physical strain. This guide explains how to properly set up equipment, identify hidden internal inclusions, evaluate delicate metal settings, and document findings with high-resolution photos.
Preparing and Setting Up for Inspection
Before you even turn on the camera, you need a proper physical setup. Good preparation prevents accidents, protects delicate pieces, and ensures your digital images are sharp and accurate.
Clean, Stabilize, and Position the Jewelry
You must thoroughly clean every piece of jewelry before placing it under the lens. A digital sensor will pick up every single smudge of finger oil and speck of lint, which can easily look like a permanent scratch or internal flaw on the screen. Use an ultrasonic cleaner or a soft microfiber cloth to properly prep the piece. Once the item is clean, use a specialized gem holder, viewing putty, or a stable third-hand tool to secure the ring or loose stone. The object must remain perfectly still, as even the slightest vibration will blur a highly magnified image and ruin your inspection.
Adjust the Working Distance and Magnification
Working distance is the physical space between the bottom of your microscope lens and the top of the gemstone. You always want enough room to comfortably manipulate the jewelry with tweezers or a metal probe without bumping your tools into the camera housing. Start by raising the microscope head to give yourself plenty of clearance. Gradually lower the lens while turning the focus dial until the surface of the jewelry comes into crisp view. Finding this balance gives you the intense magnification you need while preserving a safe working area for your hands.
Optimize Lighting and Reduce Glare
Lighting is the most important factor in gemological inspection. Intense glare from highly polished gold or a shiny diamond facet can completely blind the digital camera sensor and hide important details. You need adjustable illumination to counteract this extreme reflectivity. A versatile system like Tomlov DM9 Max 10.1" HD IPS HDMI Digital Microscope is excellent for this task because it features flexible side lights in addition to a main ring light. By dimming the main overhead light and angling the flexible side lights, you can illuminate the interior of the stone without reflecting a harsh white glare directly back into the lens.
Inspecting Gemstone Inclusions
Inclusions are the internal characteristics of a gemstone. They serve as nature's fingerprints and help you determine a stone's authenticity, origin, and overall market value.
Identify Internal Features From Multiple Angles
You can rarely see the complete picture of an inclusion by looking straight down through the top table facet of the stone. You must physically rotate the jewelry and view the gemstone through its various side facets. This multiple-angle approach helps you accurately map out internal crystals, fine needles, or feather-like fractures that hide near the edges. Viewing from the side also prevents the highly reflective top facets from blocking your line of sight into the deep core of the gem.
Adjust Lighting and Magnification to Reveal Details
Different inclusions require completely different lighting techniques to become visible on a screen. To spot dark carbon spots or opaque crystals, you should shine a bright light directly down onto the stone. However, to see faint liquid inclusions or transparent growth lines, you need to transmit light through the stone from behind or from the side. Playing with the angle and intensity of your LED lights creates unique shadows and contrast inside the gem. This contrast makes hidden internal features suddenly pop into sharp relief on your digital monitor.
Capture Images of Significant Inclusions
When you locate a significant identifying inclusion, you need to document it immediately. Modern digital microscopes allow you to snap a high resolution photo with the simple click of a button. Taking a picture of a unique internal crystal provides definitive proof of a gemstone's specific identity. If a client ever questions whether they received their original diamond back after a sizing repair, you can simply pull up the stored photo and match the internal fingerprint perfectly to their stone.
Inspecting Jewelry Settings
A beautiful gemstone is only safe if the metal holding it is structurally sound. The HDMI digital microscope is your absolute best tool for preventing lost stones and catastrophic damage.
Examine Prongs, Bezels, and Channel Settings
Metal wears down naturally over time from daily use and friction. Use your microscope to zoom in closely on the tips of the prongs, the smooth outer edges of a bezel, or the metal lips of a channel setting. You are looking for thin, paper like metal that is ready to tear or fold back. You should also check for microscopic cracks exactly where the prong bends over the crown of the stone. Catching these tiny structural weaknesses early allows you to perform preventative maintenance before the gemstone falls out entirely.
Check for Loose Stones, Gaps, and Hidden Damage
A stone might look perfectly secure to the naked eye but actually have dangerous wiggle room in the setting. While viewing the jewelry on your screen, take a soft wooden probe and gently press on the outer edge of the gemstone. Watch the monitor closely to see if the stone shifts away from the metal wall. You should also look for dark shadows or empty spaces between the metal and the gem. A properly set stone will always have the metal resting flush against its surface without any visible gaps.
Identifying Surface Damage
It is crucial to distinguish between internal flaws created by nature and external damage caused by the person wearing the jewelry. Proper identification helps determine the right repair method.
Distinguish Dirt From Scratches, Chips, and Polishing Marks
Clients often panic when they see a dark mark on their stone, instantly assuming it is a devastating crack. High magnification helps you determine the truth quickly. If the mark sits on top of the facet and has a soft edge, it is likely just dried soap or everyday dirt. If the mark breaks the surface and casts a tiny shadow under the light, it is a true scratch or a chip. You can also easily spot parallel polishing lines left behind by the original gem cutter, which helps you evaluate the overall cut quality of the stone.
Monitor Surface Changes Over Time
Certain gemstones like opals, emeralds, and pearls are quite soft and highly prone to daily wear and tear. By inspecting these vulnerable stones periodically under a digital screen, you can accurately track how quickly the surface facets are abrading. If you notice a sudden increase in tiny edge chips or surface scratches during a routine check, you can gently advise the owner to be more careful with how they wear and store their fragile pieces.
Recording Inspection Results
The greatest advantage of a digital microscope system is the ability to easily build a permanent visual database of your evaluation and repair work.
Photograph and Label Inspection Areas
Do not just take photos and leave them in a messy computer folder. You must develop a strict system for organizing your digital files. Take a wide shot of the entire ring first, followed by extreme closeups of the specific damage or unique inclusions. Label every single digital file with the client's name, the exact date, and a brief text description of the area inspected. This highly organized visual record is invaluable for insurance appraisals and professional liability protection.
Record Magnification and Lighting Conditions
When you save an inspection image, always make a note of the exact magnification level and the specific lighting setup you used. If you need to inspect the exact same ring three years later, you will want to recreate the viewing conditions. Knowing that you used a low side light and fifty times magnification allows you to duplicate the original environment perfectly. This makes it incredibly easy to accurately compare the past and present condition of the jewelry.
Compare Images Before and After Repairs
Disputes over jewelry repairs are unfortunately common in the retail industry. Taking microscopic photos before and after you work on a piece completely eliminates this stress for everyone involved. When a client drops off a ring, show them the micro fractures or worn prongs on the screen and take a photo. When they pick the ring up, show them the exact same photo alongside the newly repaired piece under the microscope. This level of visual transparency builds immense trust and beautifully highlights the high quality of your craftsmanship.
Conclusion
Incorporating a digital microscope into your jewelry inspection routine fundamentally elevates the quality of your work and the confidence of your clients. By properly setting up your workspace, manipulating light to reveal hidden inclusions, and meticulously checking delicate metal settings, you protect both the value of the gemstones and your own professional reputation. The ability to capture, store, and share high-definition images transforms a once solitary task into a collaborative and transparent experience. Mastering these digital inspection techniques ensures you will never miss a crucial detail again.