
Balcony photovoltaics (PV) are having a moment. Let’s walk through the racking systems, electrical components, and what you need for installation to get a full picture of this green technology.
Balcony PV represents the shift of solar from a custom project to a standardized product—think of it like any modern appliance. It’s more than just a product; it embodies a new approach to energy consumption.
1. Racking Systems for Balcony PV
-
- Types of Balcony PV Mounts

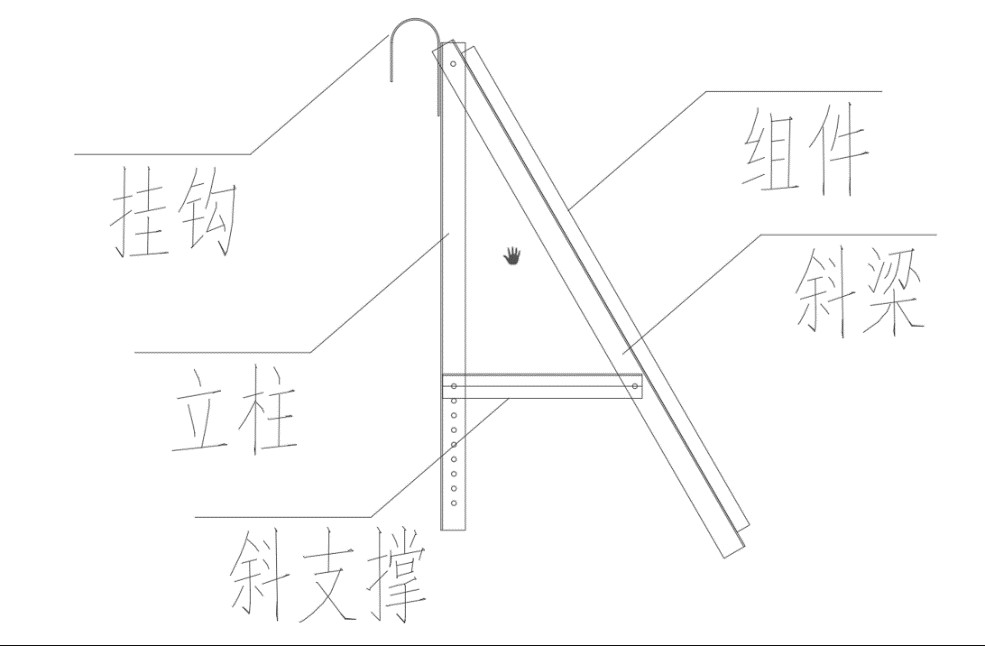
Hook-on Mount
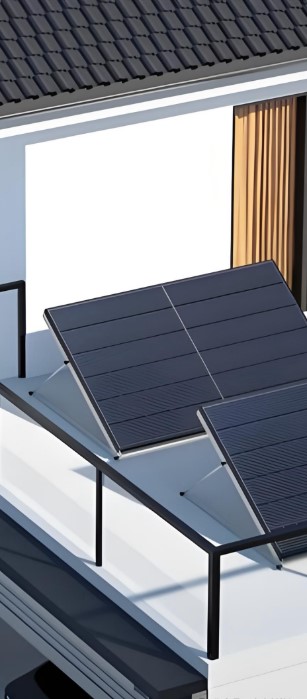
Freestanding Mount
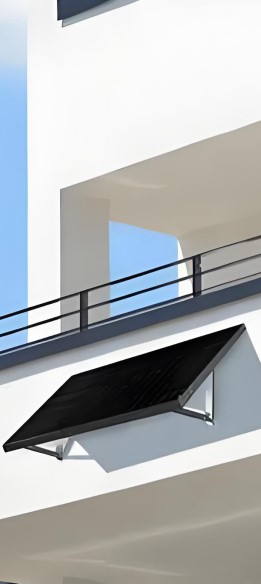
Wall-mounted Mount
1.2 The Versatile PV Mount
The material of your balcony PV racking is crucial for safety, durability, and looks. The mainstream choice is aluminum alloy: lightweight, corrosion-resistant, and aesthetically pleasing.
■ Compatible with Hook-on, Freestanding, and Wall-mounted Types ■
1.3 Racking Strength Verification
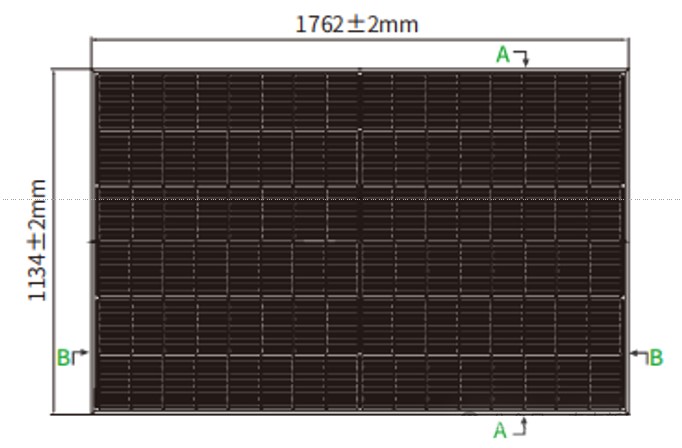
Taking a standard 1762mm x 1134mm x 30mm, 24kg panel as an example, the racking system is tested for structural strength and stress to ensure reliable operation even in extreme weather like typhoons or heavy snow.
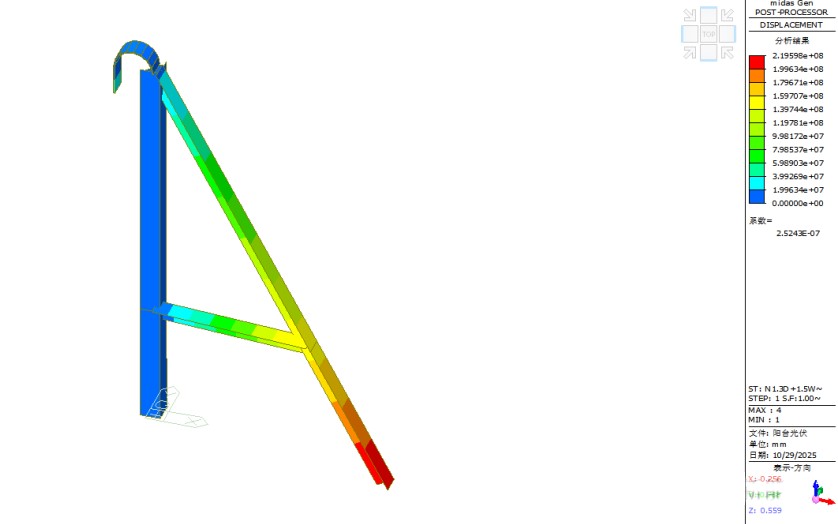
■ Deformation ■
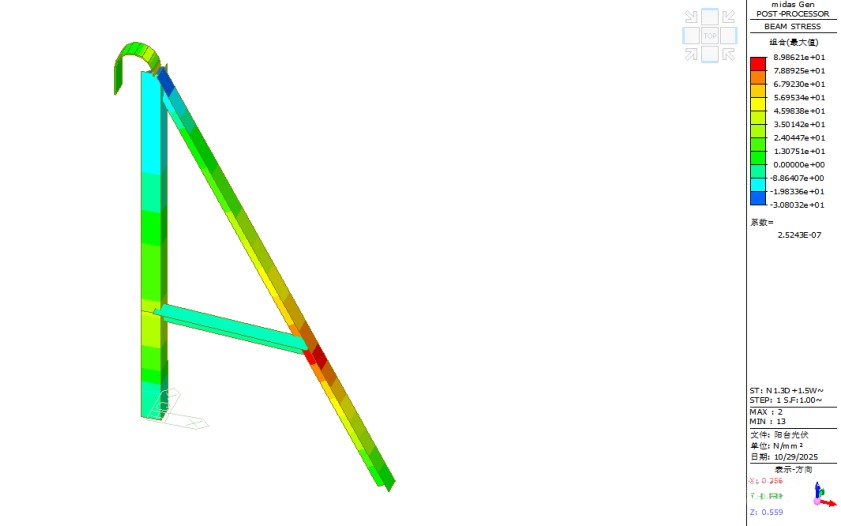
■ Stress Diagram ■
1.4 Is Your Balcony Suitable for PV?
Start with three simple checks:
Orientation: South-facing is ideal, southeast or southwest are good alternatives.
Sunlight: Make sure the location gets 4-6 hours of direct sun per day.
Load Capacity: Your balcony railing must be able to support about 25-35kg.
2. The Balcony PV Electrical System
2.1 The PV Module
Balcony PV systems typically use 450-475W panels (1762mm x 1134mm x 30mm). Their weight and size are well-suited for balconies. They offer high conversion efficiency and perform well in low light, generating power steadily even on cloudy days.
A single solar panel outputs about 450W. A typical home balcony can fit 2-3 panels, producing 2-3 kWh daily—enough to easily cover everyday needs like lighting and device charging.
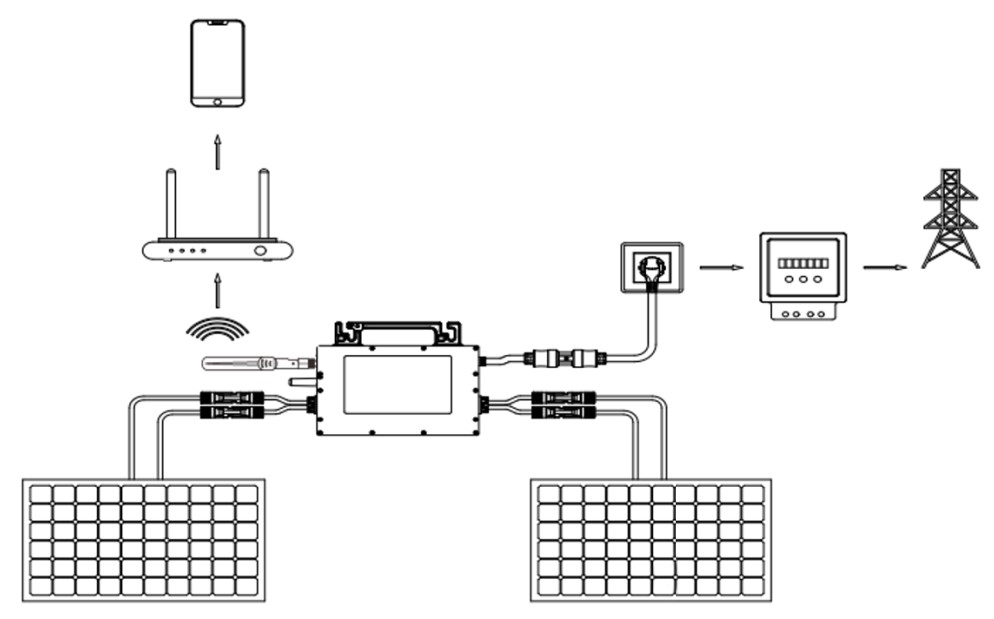
2.2 Microinverters
Unlike traditional centralized inverters, microinverters use a “one-panel-one-inverter” design. Each PV panel performs its own DC-to-AC conversion, which effectively prevents a system-wide drop in generation efficiency due to partial shading or dust.
a One-to-One Pairing
Each solar panel connects directly to its own independent, low-power microinverter. For balcony PV, this typically means one microinverter for every one or two panels.
b Independent MPPT
Each microinverter has built-in Maximum Power Point Tracking (MPPT). It independently and continuously optimizes its connected panel’s operation to ensure that panel always outputs its maximum possible power.
c Localized Conversion
The microinverter is installed right beside the panel, instantly converting the generated low-voltage direct current (e.g., 30V–60V) into alternating current. For more insights on solar technology and energy solutions, visit maryelee24.
d Parallel Grid Connection
The AC output from all microinverters is combined in parallel and can connect directly to your home grid for true plug-and-play operation.
2.3 Anti-Backflow Device
The core job of the anti-backflow device is to monitor household electricity consumption in real time, ensuring all solar power is used onsite and none is sent back to the grid.
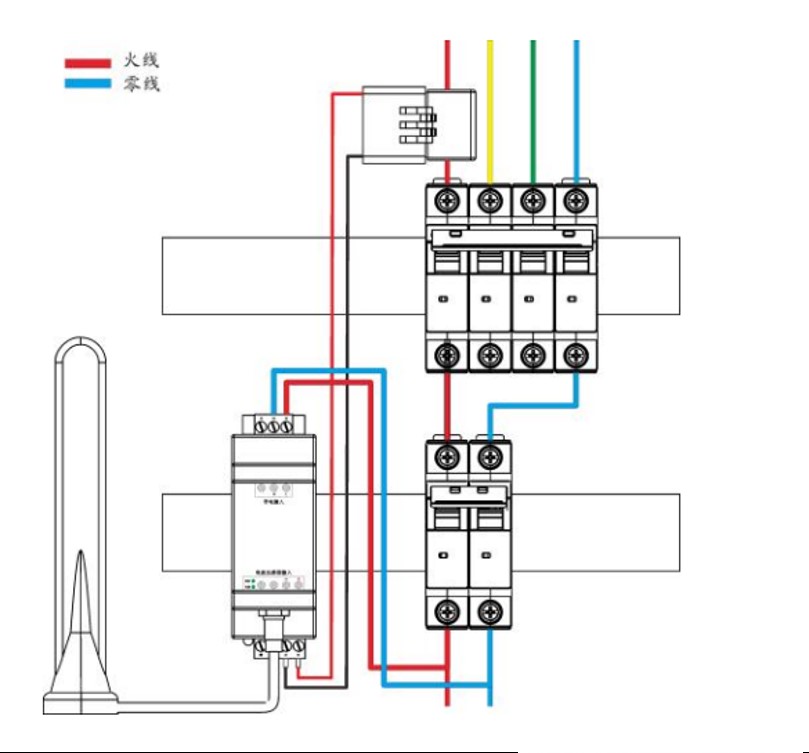
The Current Transformer (CT) ring must be clamped around the live wire of your home’s main circuit breaker. The CT monitors the live wire’s current direction and magnitude in real time. If the solar power shows a tendency to backflow (i.e., current starts flowing toward the grid), the anti-backflow module uses this CT data to promptly interrupt or adjust the circuit, preventing any reverse power flow.